To define a new rule, login to your dashboard and click on Rules > Add New Rule
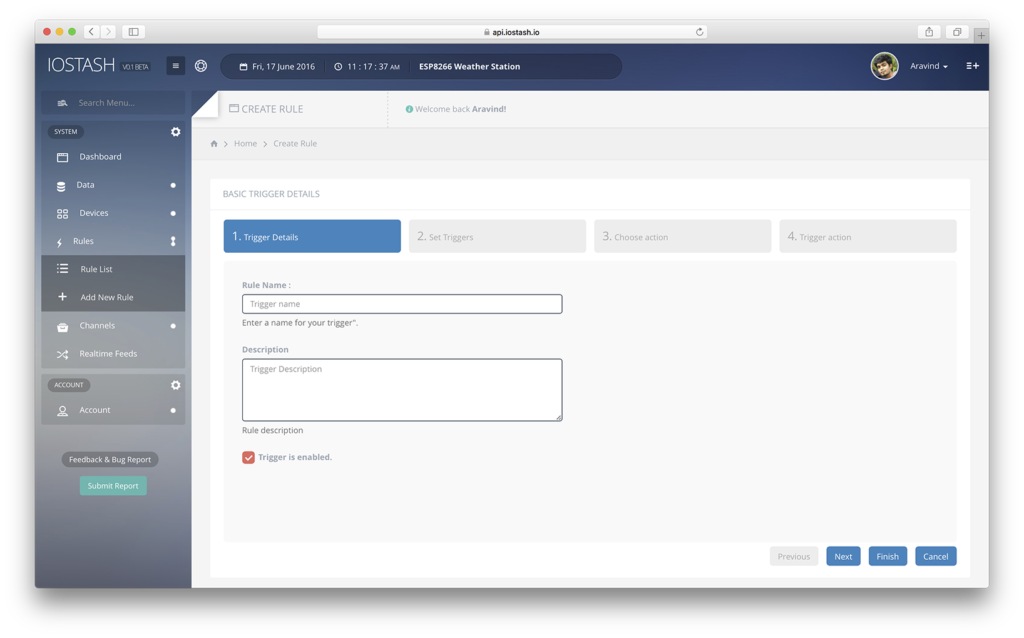
Fill out the basic description of the trigger and click next.
Now, select the data point you wish to associate with the trigger. This particular data point will be evaluated and is responsible for triggering the action
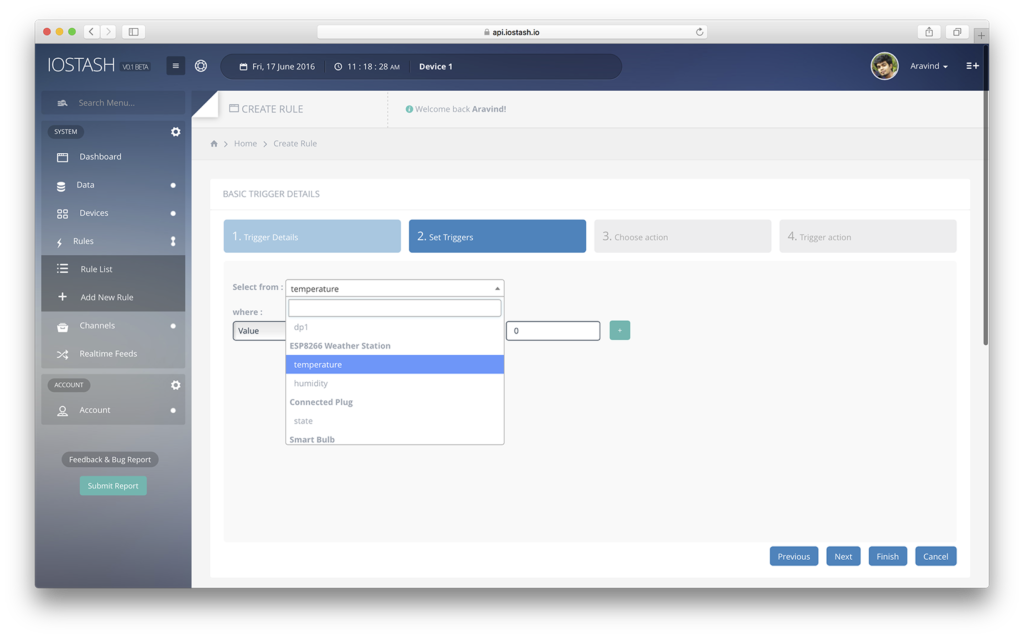
Select the datapoint of interest. Here, we're selecting the temperature datapoint we defined in the Getting Started Guide
Next, define the rule or condition for triggering the action
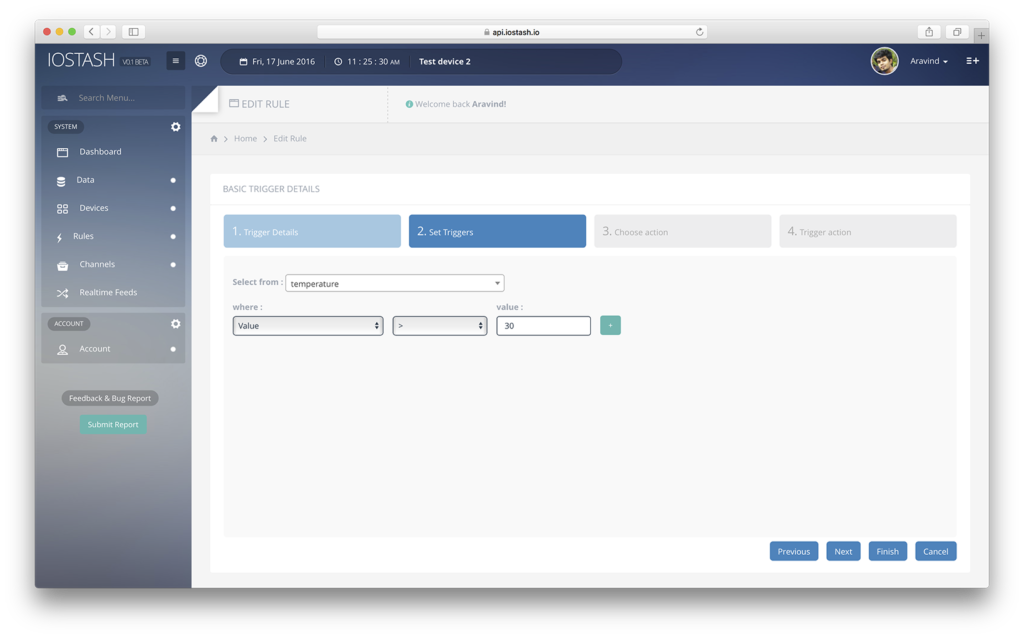
Here, we have set the rule as when value > 30. So whenever the value pushed to the temperature datapoint becomes > 30, this rule will be triggered and corresponding action will be fired. Like >, there are many other expressions available for use.
To set the action for this rule, click on Next
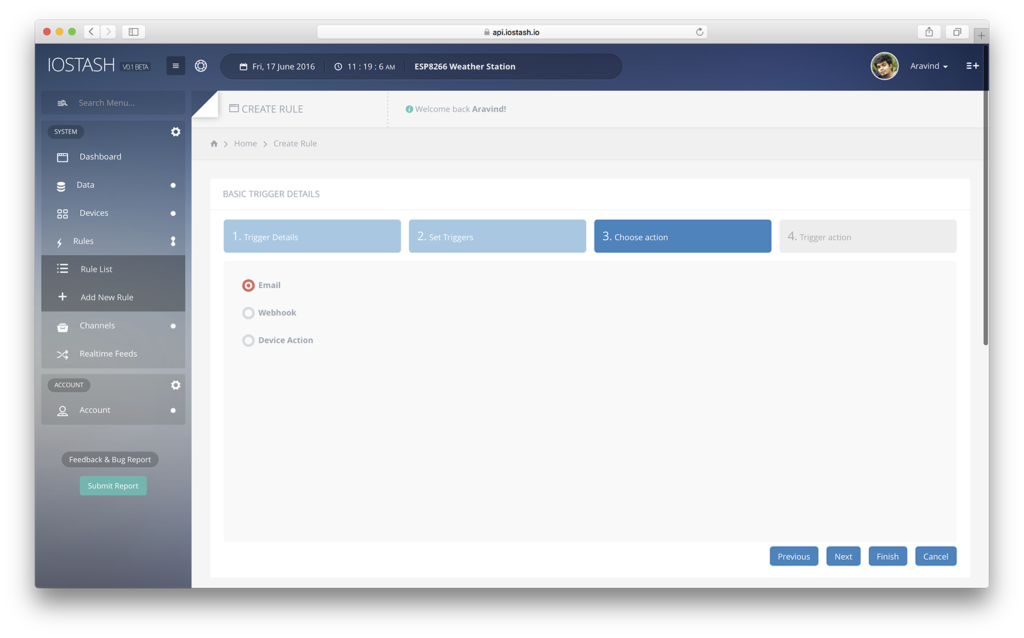
We're going to define an Email trigger, select EMail and click Next
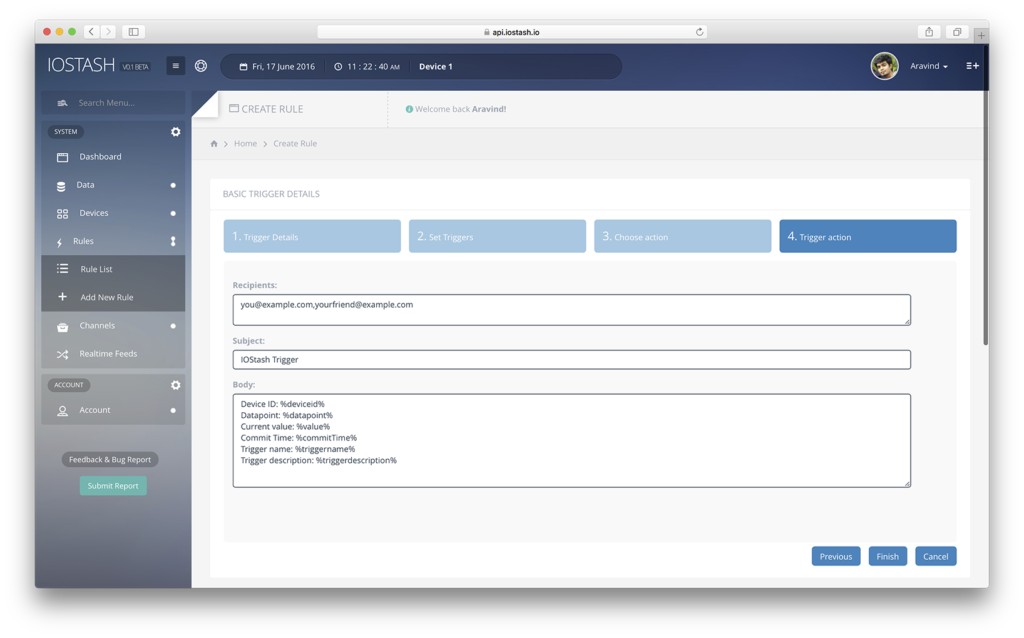
IOStash supports the following variables to be used with a trigger body:
- %datapoint% - Data point responsible for the trigger
- %deviceid% - Id of the device which triggered the rule
- %value% - Value that triggered the rule
- %triggername% - Name of the trigger
- %triggerdescription% - Description of the trigger
- %commitTime% - Time of data commit that triggered the rule
If any of these variables are defined in the trigger action body, they'll be replaced with their corresponding values by the IOStash platform before sending it. For example, The data point value is: %value% will be sent as The data point value is: 31.
When a value > 30 is pushed by the device, we'll receive an email to the address we defined:
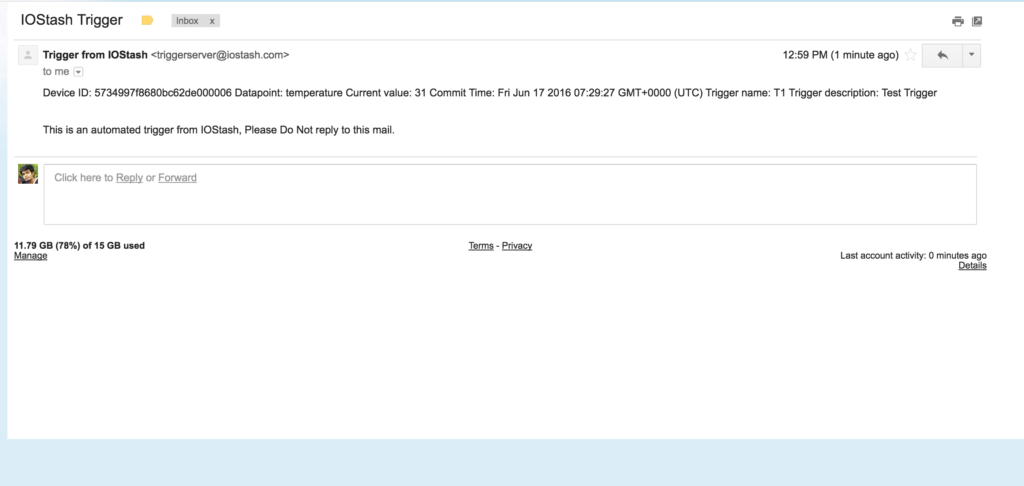
Trigger email body supports full HTML, we received the above mail because we haven't wrote any formatting code.